Chưa phân loại
Hướng dẫn cài đặt WordPress trên Ubuntu

WordPress là hệ thống blog và mã nguồn mở phổ biến nhất trên Web, nó dựa trên PHP và MySQL . Gần đây thì Ubuntu 20.04 đã chính thức được ra mắt với nhiều tính năng bảo mật mới. Để tiếp cận với nhưng tính năng mới của Ubuntu, mình sẽ hướng dẫn các bạn cách để cài đặt wordpress với Apache2 trên Ubuntu 20.04.
Sau đây là các bước để cài đặt một trang web wordpress chạy trên Apache2 – Ubuntu 20.04:
- Cách thiết lập WordPress
- Cách cấu hình WordPress
- Máy tính chạy Ubuntu
- Hướng dẫn này cũng sẽ chỉ cho bạn cách định cấu hình cơ sở dữ liệu cho WordPress
Để cài đặt PHP và Apache, sử dụng lệnh sau:
sudo apt update
sudo apt install apache2 ghostscript libapache2-mod-php mysql-server php php-bcmath php-curl php-imagick php-intl php-json php-mbstring php-mysql php-xml php-zip curlTải và cài đặt WordPress
sudo mkdir -p /srv/www
sudo chown www-data: /srv/www
curl https://wordpress.org/latest.tar.gz | sudo -u www-data tar zx -C /srv/wwwCấu hình Apache cho WordPress. Chúng ta tạo file với lệnh sudo nano /etc/apache2/sites-available/wordpress.conf và dán vào các dòng sau:
<VirtualHost *:80>
    DocumentRoot /srv/www/wordpress
    <Directory /srv/www/wordpress>
        Options FollowSymLinks
        AllowOverride Limit Options FileInfo
        DirectoryIndex index.php
        Require all granted
    </Directory>
    <Directory /srv/www/wordpress/wp-content>
        Options FollowSymLinks
        Require all granted
    </Directory>
</VirtualHost>
Ctrl + X > Y > Enter. Sau đó, chúng ta bật site WordPress với lệnh:
sudo a2ensite wordpress
Bật URL:
sudo a2enmod rewrite
Tắt trang mặc định của Apache:
sudo a2dissite 000-defaultCuối cùng, load lại cấu hình Apache với lệnh, chúng ta có thể sử dụng lệnh này nếu máy chủ hoặc Website có vấn đề:
sudo service apache2 reloadBất kỳ trang web nào khi chạy cũng sẽ cần một cơ sở dữ liệu, các bước sau đây thực hiện kết nối trang WordPress với cơ sở dữ liệu MySQL. Thực hiện các lệnh sau (lệnh sau dấu “$”):
$ sudo mysql -u root
Welcome to the MySQL monitor.  Commands end with ; or g.
Your MySQL connection id is 7
Server version: 5.7.20-0ubuntu0.16.04.1 (Ubuntu)

Copyright (c) 2000, 2017, Oracle and/or its affiliates. All rights reserved.

Oracle is a registered trademark of Oracle Corporation and/or its
affiliates. Other names may be trademarks of their respective
owners.

Type 'help;' or 'h' for help. Type 'c' to clear the current input statement.

mysql> CREATE DATABASE wordpress;
Query OK, 1 row affected (0,00 sec)

mysql> CREATE USER wordpress@localhost IDENTIFIED BY '<your-password>';
Query OK, 1 row affected (0,00 sec)

mysql> GRANT SELECT,INSERT,UPDATE,DELETE,CREATE,DROP,ALTER
    -> ON wordpress.*
    -> TO wordpress@localhost;
Query OK, 1 row affected (0,00 sec)

mysql> FLUSH PRIVILEGES;
Query OK, 1 row affected (0,00 sec)

mysql> quit
Bye
Bật cơ sở dữ liệu MySQL bằng lệnh sudo service mysql start
Bây giờ, chúng ta sẽ bắt đầu cấu hình WordPress kết nối MySQL. Đầu tiên, copy file wp-config.php đến thư mục chưa site WordPress wp-config.php:
sudo -u www-data cp /srv/www/wordpress/wp-config-sample.php /srv/www/wordpress/wp-config.php
Tiếp theo, cấu hình id và mật khẩu cho wordpress kết nối database (không đổi r database_name_here và username_here trong lệnh dưới đây. Thay đổi <your-password> với mật khẩu của database [đã tạo ở bước 5].):
sudo -u www-data sed -i 's/database_name_here/wordpress/' /srv/www/wordpress/wp-config.php
sudo -u www-data sed -i 's/username_here/wordpress/' /srv/www/wordpress/wp-config.php
sudo -u www-data sed -i 's/password_here/<your-password>/' /srv/www/wordpress/wp-config.php
Cuối cùng, chỉnh sửa file wp-config.php bằng lệnh
sudo -u www-data nano /srv/www/wordpress/wp-config.php
Tìm các dòng sau:
define( 'AUTH_KEY',         'put your unique phrase here' );
define( 'SECURE_AUTH_KEY',  'put your unique phrase here' );
define( 'LOGGED_IN_KEY',    'put your unique phrase here' );
define( 'NONCE_KEY',        'put your unique phrase here' );
define( 'AUTH_SALT',        'put your unique phrase here' );
define( 'SECURE_AUTH_SALT', 'put your unique phrase here' );
define( 'LOGGED_IN_SALT',   'put your unique phrase here' );
define( 'NONCE_SALT',       'put your unique phrase here' );
Xóa các dòng này (Ctrl + K). Và thay thế bằng các dòng sau khi truy cập địa chỉ này https://api.wordpress.org/secret-key/1.1/salt/. (Đây là địa chỉ để tạo key ngẫu nhiên sau mỗi lần mở).
Lưu lại file bằng Ctrl + K > Y > Enter.
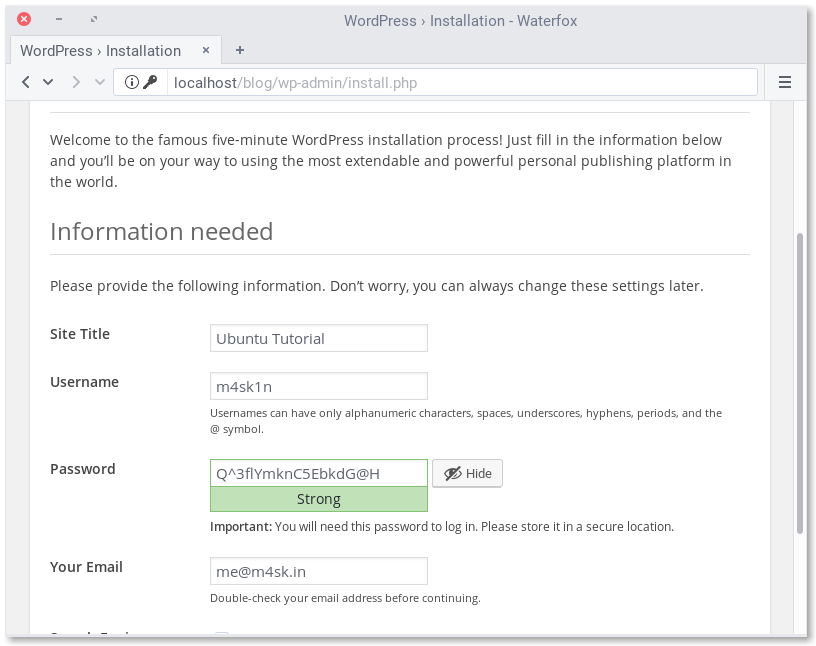
Mở đường dẫn http://localhost/ trong trình duyệt của bạn. Làm theo hướng dẫn màn hình.

Trên đây là hướng dẫn cài đặt và cấu hình một trang WordPress đơn giản. Hi vọng sẽ giúp ích cho các bạn.
Chúc các bạn thành công.
Bấm vào đây để lên lại đầu trang.

